Ever wanted to produce top class, succulent, perfectly spicy, smoky pulled pork in the comfort of your own back yard? Ever felt confused or scared by the process or held back by lack of special equipment? Then this post is for you!

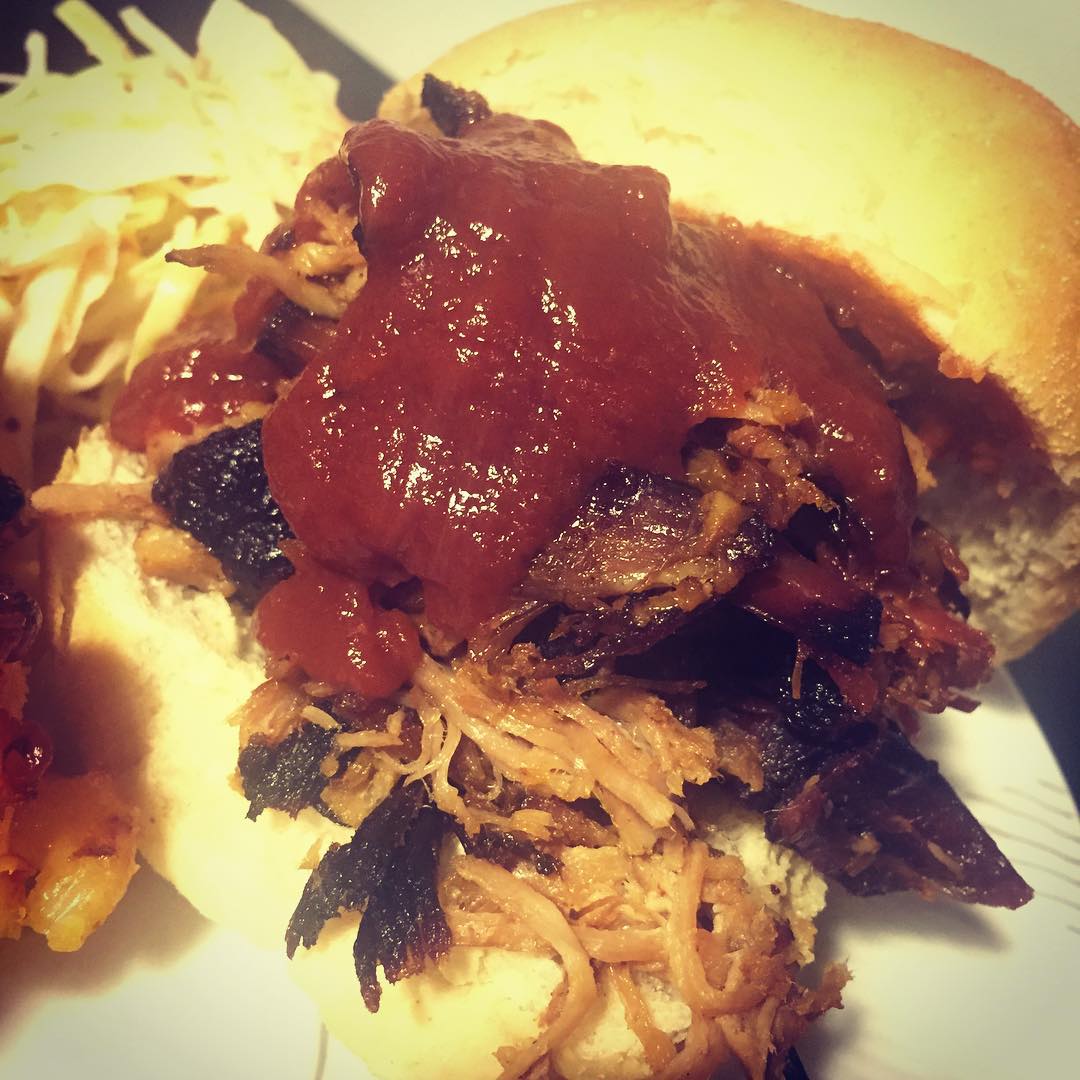
Pulled Pork…It’s finger-licking good!
This is the big one. The climax in the Beginner’s Guide to BBQ series. If you’ve been reading along from the beginning, this is the one that will make it all worth it. In Part 1 of our BBQ primer, we talked BBQ basics. In Part 2, I gave you the recipe for my perfect dry rub. Today, we combine all we’ve learned with some new knowledge to create a true BBQ classic: Pulled Pork! Succulent, spicy, smokey pork that melts in the mouth and brings flavor like nothing else in this world. Best of all, we’re gonna do it without professional equipment, using nothing but a kettle grill, a thermometer, a few other tools and a bit of know-how.
How to read and use this guide: This guide is intended for the (adventurous) beginner into BBQ as well as the reasonably seasoned BBQ lover. Heck, if you’re a pro, and have something to ad, I’d be honored! As such, the first part of this post goes into quite a lot of detail about the various steps of the BBQ process and the art of smoking meat itself. If you’re comfortable around a smoker and just want to see how I do things, you can skip right ahead to the recipe and just wing it from there. If not, read on and hopefully you’ll learn a thing or two.
Now, my goal with this post is to teach you to produce quality BBQ with as little special equipment as possible – in this case a kettle grill and a thermometer is the only equipment needed. Truth be told, though, you don’t even need a smoker or grill to produce pulled pork. You do if you want to call it BBQ, though. My friend Kamilla has been known to produce an approximation of this recipe in her home oven and her husband and friends love her for it. BBQ it is not, though, that would require smoke as an important flavor component, but rumor has it it turns out quite well regardless.

Attention: Long read/Long procedure ahead! Better fuel up!
Also, please do not forget to check out parts one and two of the series as they’ll offer both background and a much-needed BBQ dry rub recipe.
Got that? Great. Now, as mentioned you won’t need a lot of special equipment to pull through with this adventure. You will need a few things, though, so make sure you have the following at hand before embarking on this adventure:
- A kettle grill with top and bottom vents
- An accurate (preferably wireless) thermometer
- An aluminum tray capable of holding the piece of meat you’re cooking
- A smaller aluminum tray capable of holding at least a liter of water while still being able to fit at the bottom of your grill and leave room for charcoal briquettes around it.
- Cling film or large zip-lock bag
- A five kilo bag of quality, long-burning charcoal briquettes such as Heatbeads
- 120 grams of light smoke chips (Apple and repurposed Bourbon barrels work really well)
- A lot of time and patience.
And bearing that last entry on the list in mind, a fair warning before we get started: If you’re to attempt to mimic my every move, you’re seriously going to need a bit of time. This, without a doubt, is my most time-consuming recipe to date – by quite a margin. Now, I know that sounds like a lot coming from me, the guy whose debut on the food blogging scene was a two day recipe for pulled pork chili con carne, and indeed it is. If you’re going to attempt this recipe step by step, you’ll need to set aside at least a good three days or so. No less! No… Stop screaming… Good food takes time and relax, it’s not all active cooking time. I’m sorry. I don’t make the rules!
Granted, if you’re in a hurry, you can cut it down to as little as 24 hours, give or take… But friends don’t let friends get away with half-assed efforts so I’m here today to show you the true, low and slow way of preparing pulled pork. I will tell you where to cut corners along the way if you really need to, but my hope is you’ll give the full method a whirl at some point and realize the difference between true BBQ and, well, what the lovely people of Memphis like to refer to as poser BBQ.
And let me just stop you before you get to the “But Johan, is it REALLY worth it?” – That is up to you and your concept of time to decide. To me, it is, and put it this way: I’ve never had a single complaint about my pulled pork. Au contraire, I’ve been told several times over that I make the best pulled pork sandwiches in the world. Which is a blatant f’ing lie, but a blatant f’ing lie that sounds pretty damn sweet off the lips of beautiful young ladies with an above average culinary grasp.
White men can’t jump, but they can produce pretty decent BBQ! And it’s totally worth your time!
Is it worth it? You decide! For now, without further mucking about (this post will be lengthy enough as it is), I submit for your approval, my guide to Perfect Pulled Pork in the hopes that you, too, find it worth your time.

Timing is everything: As with any lengthy preparation, BBQ takes a bit of planning. Aside from a good 36 hours of preparation, some 12 to 16 hours of semi-active cooking time is involved. As a result, this is obviously somewhat of a weekend or holiday project and a bit of time management and planning will be involved. My best advice? Read this guide carefully before getting started then plan ahead in terms of shopping and preparation and expect to get up very early in the morning if you plan to eat on the day evening of cooking.
Step 1 (Day One): I like big butts and I cannot lie
Alright, if you want to succeed in BBQ, the first thing you’re gonna have to do is to go get yourself a nice, big butt! A Boston Butt or Pork Butt, that is… Or, well, a pork shoulder by any other name.
I don’t know who came up with the idea of naming shoulder of pig a Boston Butt, but such are the ways of the world and I’ve always found the name ever so charming and entertaining. Regardless of naming conventions, though, if we’re to cook pulled pork, we’re gonna need a cut of meat from the shoulder of a pig (and make that a happy, organic pig if at all possible.) It can be just about as large as you like and it doesn’t have to be pretty. In fact, it shouldn’t be pretty. Unless, of course, your idea of pretty involves chunky, fatty, bony chunks of meat full of connective tissue. Hey, to each their own.
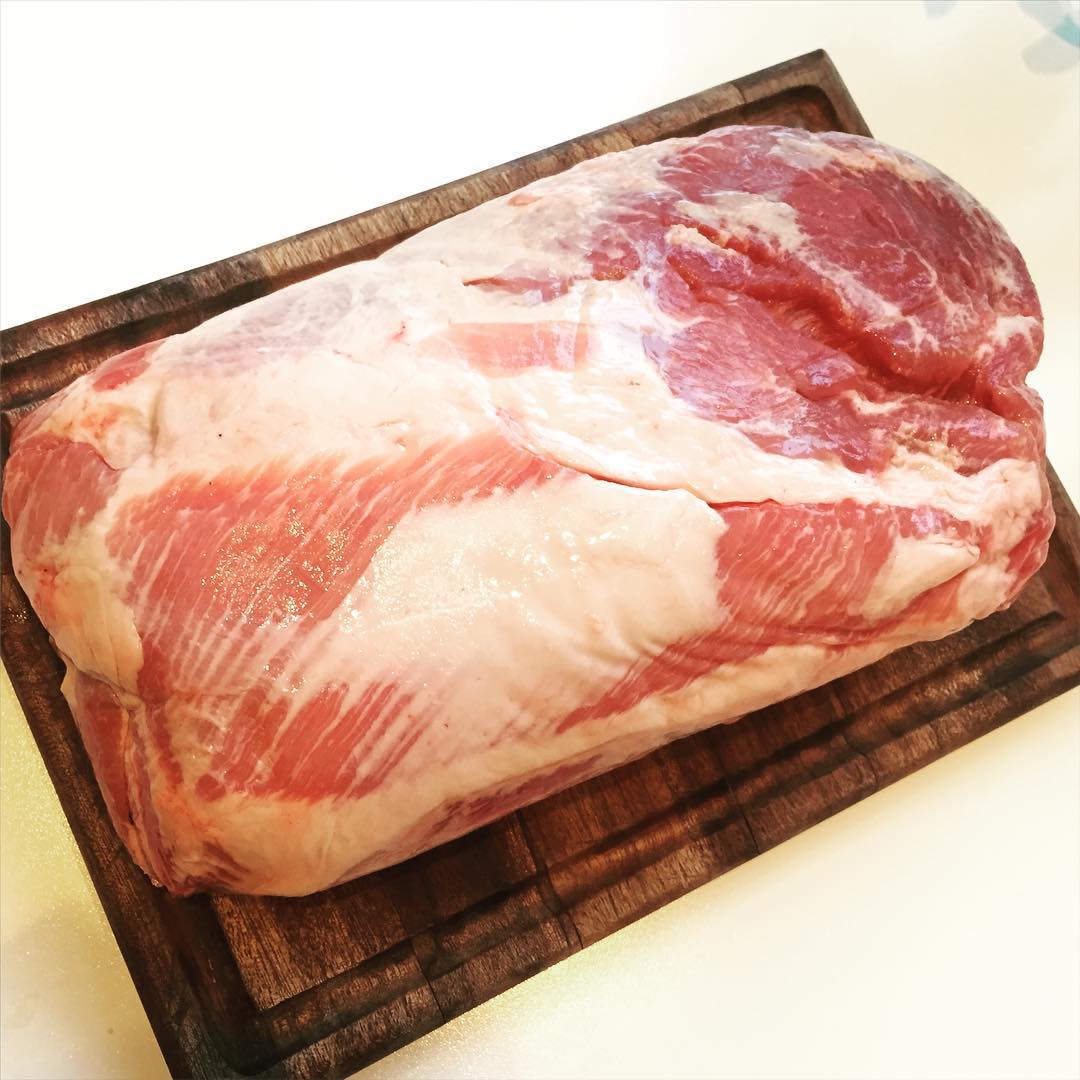
I like big Butts and I cannot lie!
Unlike other applications where we usually want our meat lean, pretty and bone-free, when dealing with BBQ (and certain other slow roasting methods), we actually want our meat to be irregular, fatty and full of connective tissue. And if we can get a pork shoulder roast with the bone in, that’d be even f’ing better. Not only are such cuts cheaper, they are also much, much more flavorful after (some) a lot of time on the smoker because the fat and connective tissue will render into the meat creating flavor and succulence, while the bone, if there, will provide flavor of it’s own. And you won’t even have to worry about removing it after the cooking process. It’ll slide right out.
So, for starters, go to your butcher and ask him (her?) for the leanest meanest, juiciest pork shoulder he has – and don’t skimp on volume. Pork shoulder shrinks a lot during cooking. You’ll probably want at least 200 grams per diner, but I generally just go with whatever my smoking setup can hold. BBQ is a lot of work and great party food so you might as well cook for a crowd and, y’know, God forbid you’d have leftovers… Know what I mean?
Once you’ve acquired the perfect piece of pork shoulder, it’s time to take it home and start contemplating flavor.
Step 2 (Evening, Day One): Brining, the science of Reverse osmosis and why it’s worth the wait
Once you’ve brought home your perfect pork shoulder roast, you’re faced with the first of several seriously lengthy steps to force as much flavor as possible into your pulled pork creation, namely brining!
Brining, rather simply, refers to the art of completely submerging a piece of meat into a (very) salty solution for an extended period of time – a whopping 24 hours in the case of a chunk of meat as big as our newly acquired pork butt- with two very specific purposes: tenderizing the meat and adding flavor.
How on earth is a saline solution going to achieve that? And how exactly does that separate a brine from a marinade, you might ask? Elementary, my dear reader, the separation lies in the simple fact that a marinade, contrary to popular belief, doesn’t actually tenderize meats, it merely adds flavor (and that in itself is a pretty big thing). A brine, on the other hand, has the primary purpose of not only tenderizing meat but also helping it stay moist during extended cooking and a very important secondary purpose of adding flavor.
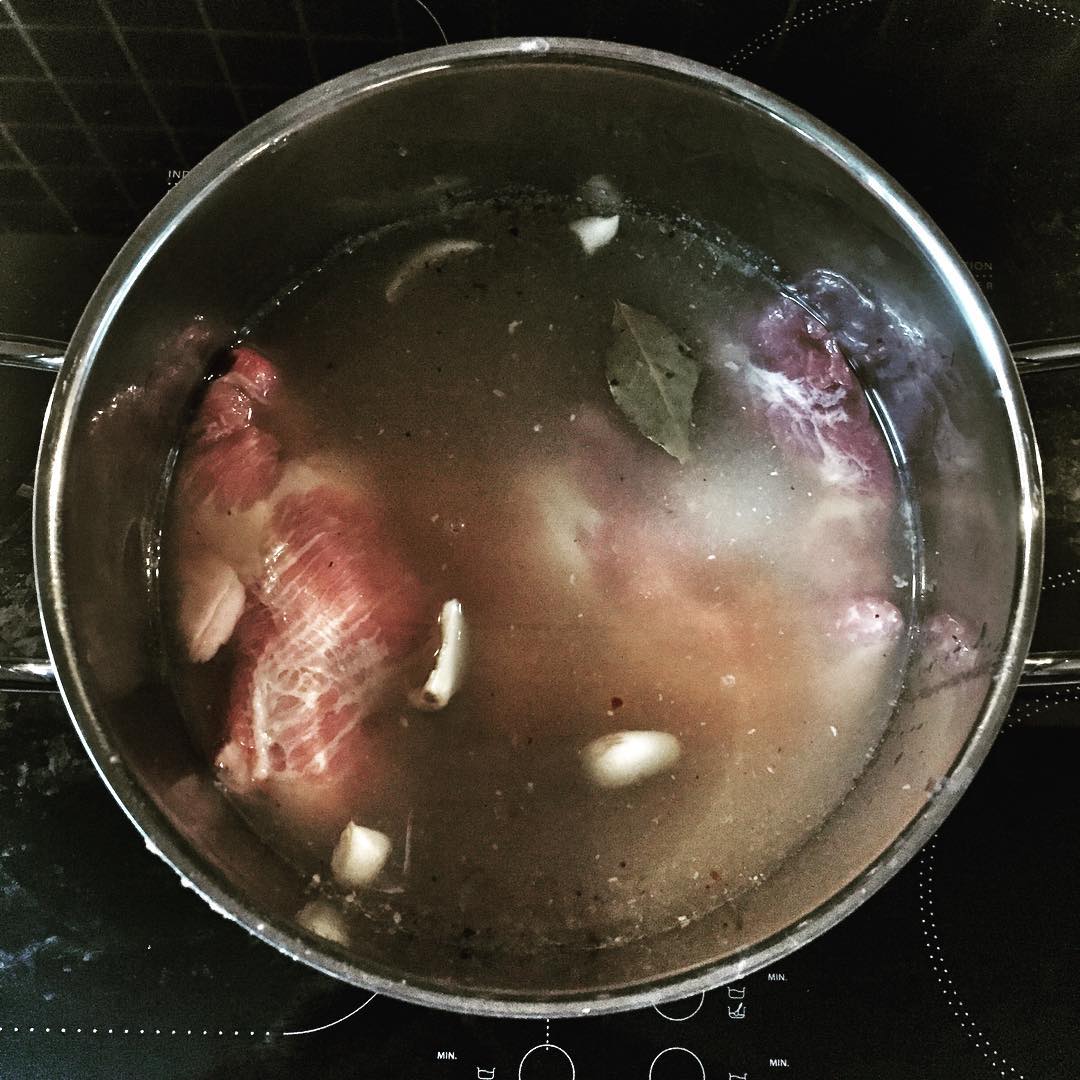
Whole Lotta Brinin’ Goin’ On
And, how then, does a brine succeed in doing what a marinade fails to do? Again, it’s shockingly simple and all about composition. Where marinades are usually based around oils, spices and/or herbs and an acidic component such as citrus juice, wine or vinegar, brines are based around two things: water (or water-like liquids) and salt, plenty of it – in rather precise proportions.
Granted, salt and water doesn’t sound like much of a magical elixir, but this is where our good, old friend science comes into play. By submerging our newly acquired pork shoulder in a solution with just the right salinity, a process known as reverse osmosis (God, that’s a sexy word… What!?) occurs during which (in simplified terms) the cell walls of the meat are ruptured by the salt, causing the moisture inside to escape into the brining solution. Which, granted sounds undesirable. With the cell walls damaged the moisture lost will, however, given time be slowly absorbed back into the meat at a rate larger than the liquid lost.
This, my friends, means that after a bit of time, 24 hours in this case, we will end up with a piece of meat that is not only juicier and more tender (thanks to the cell damage) than what we started out with, but also seasoned from the inside out because of the salt content in our brining solution. And that is one perfectly good reason why you shouldn’t skip this step unless absolutely pressed for time. But there is, of course, more:
The clever reader will by now already have deducted that if we can salt a piece of meat inside out with a brining liquid, we can also use it for transporting any water soluble flavor into the meat prior to cooking, thus making for an even tastier end product. And yes, my friends, that is exactly why brining is such an important step in BBQ that could – but shouldn’t – be skipped:
Brining is one single, largely uncomplicated step that really requires no effort on your part but 24 hours worth of your patience, yet still serves to add so much extra flavor and character to the finished pulled pork. And the flavor combinations are endless: salt is a given, but what about replacing a bit of the water with apple juice or apple cider vinegar, both great friends of pork. Usually sugar, too, is a given in brines for white meat because of the sweetness it adds, along with pepper, bay leaves, chili or red pepper flakes… And well, the possibilities, like I said, are endless.
I’ve taken the liberty of giving you my brine recipe below, but you can (and should) really tune it any way you like. Whatever you do, don’t skip this step, okay? Please! So make a brine (insert link), place your pork carefully in it, making sure it’s completely submerged and then go ahead and forget about it for a good 24 hours before moving on to step 3.
Stressed for time? Then skip Step 2! As much as I don’t want you to, the brining is probably the least important step in the process and I would rather you save time here than on the rub or the cooking process. Ugh, I can’t believe I wrote that.
Step 3 (Evening, Day Two): Applying the dry rub
Okay, now that I’ve laid siege to a good 24 hours of your time, you may be thinking that we’re about ready to start cooking. Uh, well, patience young grasshopper. Again, the attentive reader will point out that we’re still quite a way from the 72 hour mark. And that’s because we’re not quite done adding flavor in the most time consuming of ways yet.
No, no, we’ve only just now reached the critical point. What I in part two of our series described as the essence of BBQ, the application of a dry rub: the blend of spices that gives BBQ its heart and soul. You can use anything you like here, store-bought and homemade. I would, of course, advice you to make your own – and, really, what kind of a food blogger would I be if I did not encourage you to use my very own recipe for the purpose?
Regardless of product used, it is important that you do not skip this most important of steps and it is important that you leave the meat to rest for a while after applying the rub. Tradition dictates that you apply the rub, then wrap the meat tightly in cling film and leave in the fridge at least overnight. 12 hours that is. If you’re in an absolute hurry, you probably could knock a couple of hours off this time. Know, though, that you would be messing with tradition and, well, one always does that at ones own risk. Got it? Good! Time to apply the rub!
But first… Stop… Collaborate and listen! The brine that we have just had our pork shoulder swimming around in for 24 hours is very salty indeed, so before you go messing around with any dry rub which brings even more salt to the party, you must firstly (and obviously) remove your pork shoulder from the brine, then rinse it thoroughly to remove excess salt from the surface and lastly pat it thoroughly dry so the rub will stick.
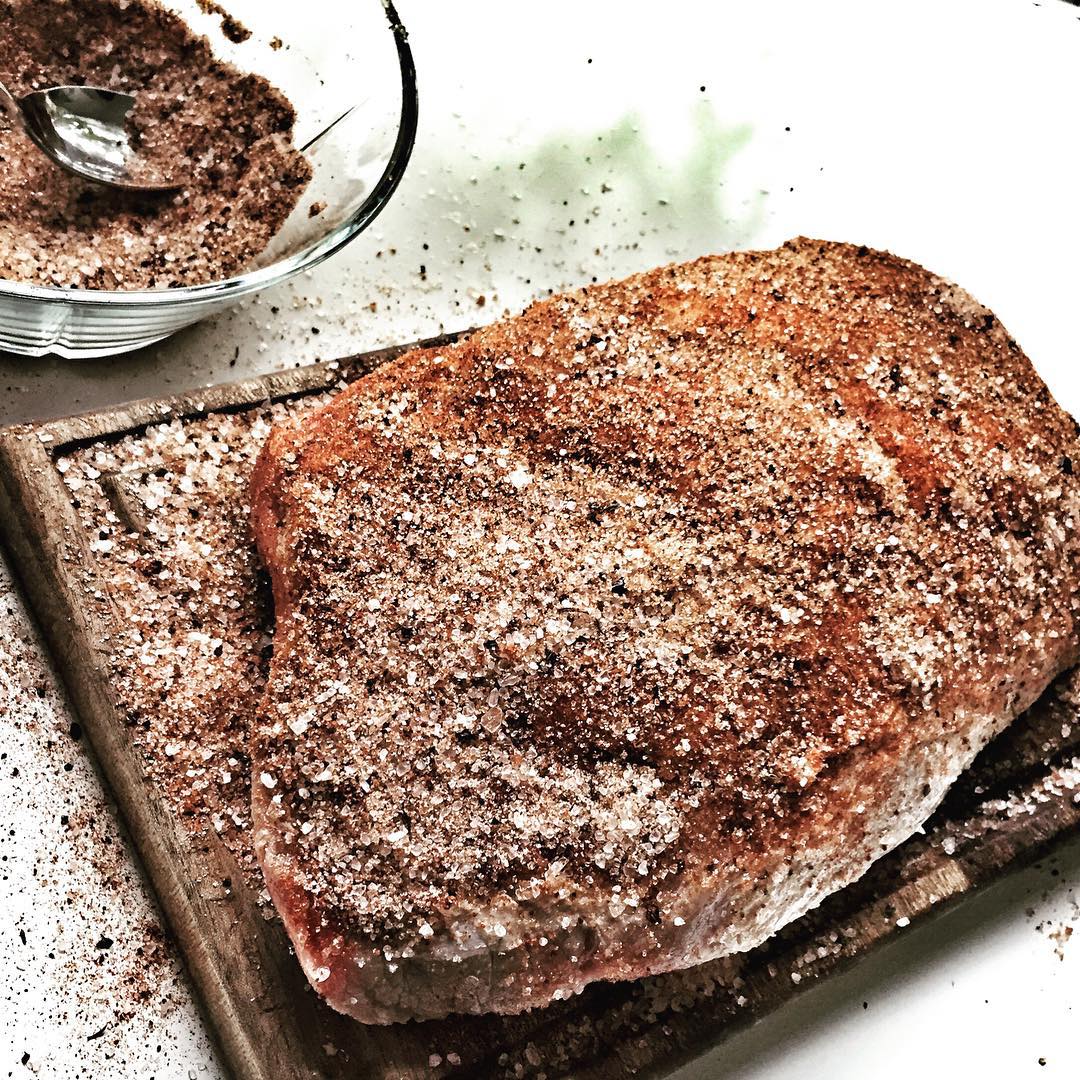
Never be prissy with the dry rub coverage!
Next comes the most enjoyable part. Grab your now dry pork shoulder roast, put it on a board and sprinkle the rub on it… Generously… Go on… Really go to town… Now slap it… Uh… Well, pat it at least, rub it, really work the rub thoroughly into the roast on all sides. And don’t be prissy with it. Check the image above for proper rub coverage and do me proud, will you?
Finally, do what the pros would do and wrap your pork butt tightly in cling film or a large ziplock bag and stash it in the fridge for a good twelve hours to let the flavors of the rub really soak into the surface of the meat. Again, twelve hours seem a long time, but there’s a reason they call it overnight. Go on, forget about it, get some sleep. We’re getting up very early in the morning!
Step 4 (Early Morning, Day Three): Getting up and setting up the smoker
As mentioned about a million times already, timing is everything when it comes to BBQ and, undoubtably, this step no 4 will be the hardest part for all of us as it involves getting up pretty early in the morning and doing some light monitoring during most of the day.
Essentially, if you plan on eating at 8PM, for optimum results, you should plan on getting up and lighting the grill at 4 AM. Unless, of course, you want to get everything ready the day before and reheat slowly as serving time approaches. If you want to serve your pork fresh off the grill, you should plan to get started no less than 12 hours before dinnertime 14-16 would be even better. Now, don’t worry, you can take it easy during the day once things get going and maybe swatch watch duty with others, but as self-proclaimed pit master, it’s your duty to get things going. Remember, with great power comes great responsibility.
First things first, remove your pork shoulder from the fridge, unwrap it, place it in a suitable disposable aluminum tray and let it sit on the counter as you get the smoker ready. Or in the case of this guide, your grill. As I mentioned in part one of our series, almost any enclosed metal object regardless of shape and size can be used as a smoker as long as it has some way of holding your meat suspend above a heat source and a way of letting air in at the bottom and out at the top. For the purpose of this post, I’ll focus on a kettle grill. I don’t like giving names, but just think of the world’s most famous brand and you’ll probably have an idea of what I use.
Great, so the first thing you’ll have to do is open up your grill and remove the top grate. Next, put an aluminum tray at the bottom of the grill and fill it with water. This will help maintain a moist cooking environment which BBQ meats love as well as help us keep the temperature down.
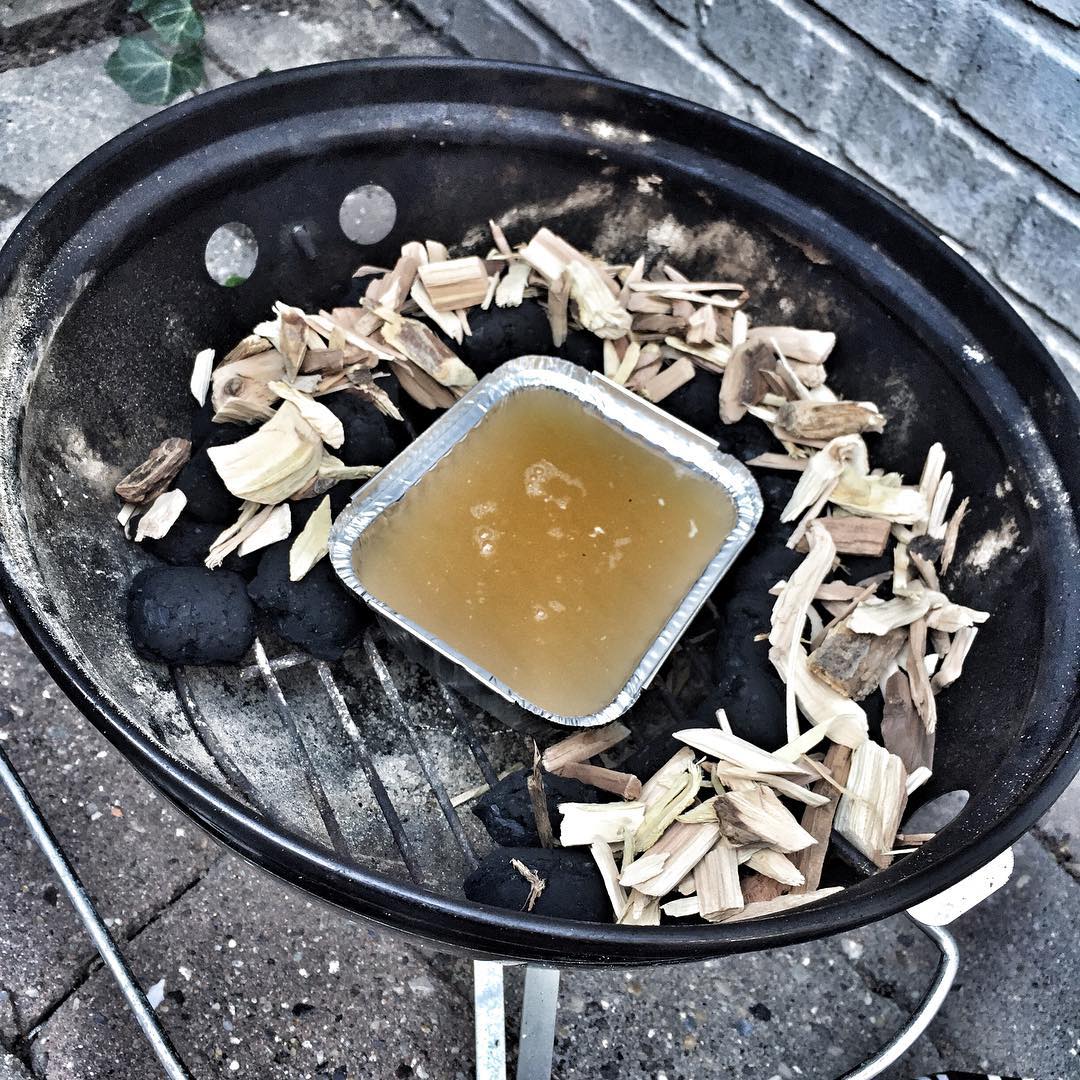
Setting up your DIY smoker
Next, we lay down our heat and smoking source. As for heat sources, I prefer long-burning charcoal briquettes (I don’t like giving names, but Heatbeads is a pretty good brand!). For my smoke source, I prefer a half and half mix of apple wood chips and chips made from repurposed Bourbon barrels… And I don’t soak my chips prior to smoking, thank you very much, and here’s why.
The goal when placing down our briquettes and smoke wood is to place them in a way in which they don’t sit directly beneath the meat so as to create an indirect heat source and also in a way that they burn neither too fast nor too hot. Some people like to accomplish this by putting a few briquettes (say ten) and a few smoke chips on either side of the water tray, then carefully adding a few lit briquettes to each pile to get thing going. Others build what has been known as the Ring of Fire: a circular formation of briquettes topped with smoke chips spiralling around the pan of water which is then lit carefully at one end to allow the fire to slowly burn to the other. The choice is yours, really. Either way works pretty well with the second probably being less high maintenance as long as you keep a watch on the temperature of the smoker during cooking. I usually go with the latter approach myself as I find it the easiest to control.
How many briquettes should you use, you may be wondering? Well, that totally depends on the size of the grill. Heatbeads burn long (4-5 hours) and they burn hot, so depending on the size of your grill, you’ll probably need anywhere from 5-20 per 5 hours of cooking, plus a few to get things started, probably making for a total of 20 – 60 (20 for a very small kettle like Weber’s Smokey Joe, 60 for your average sized kettle). This is where you might have to experiment a bit, just remember you can always add more, it’s a fair bit harder to remove red hot briquettes during the heat of battle. Basically, a five kilo bag of briquettes should more than do you in. Since we’ll be checking on things about six hours in anyway, you will have a chance to restock as you go, so don’t worry too much. And what of the wood? Here, I go with about 120 grams of wood chips divided evenly across the coals so that they’ll burn nicely and slowly.
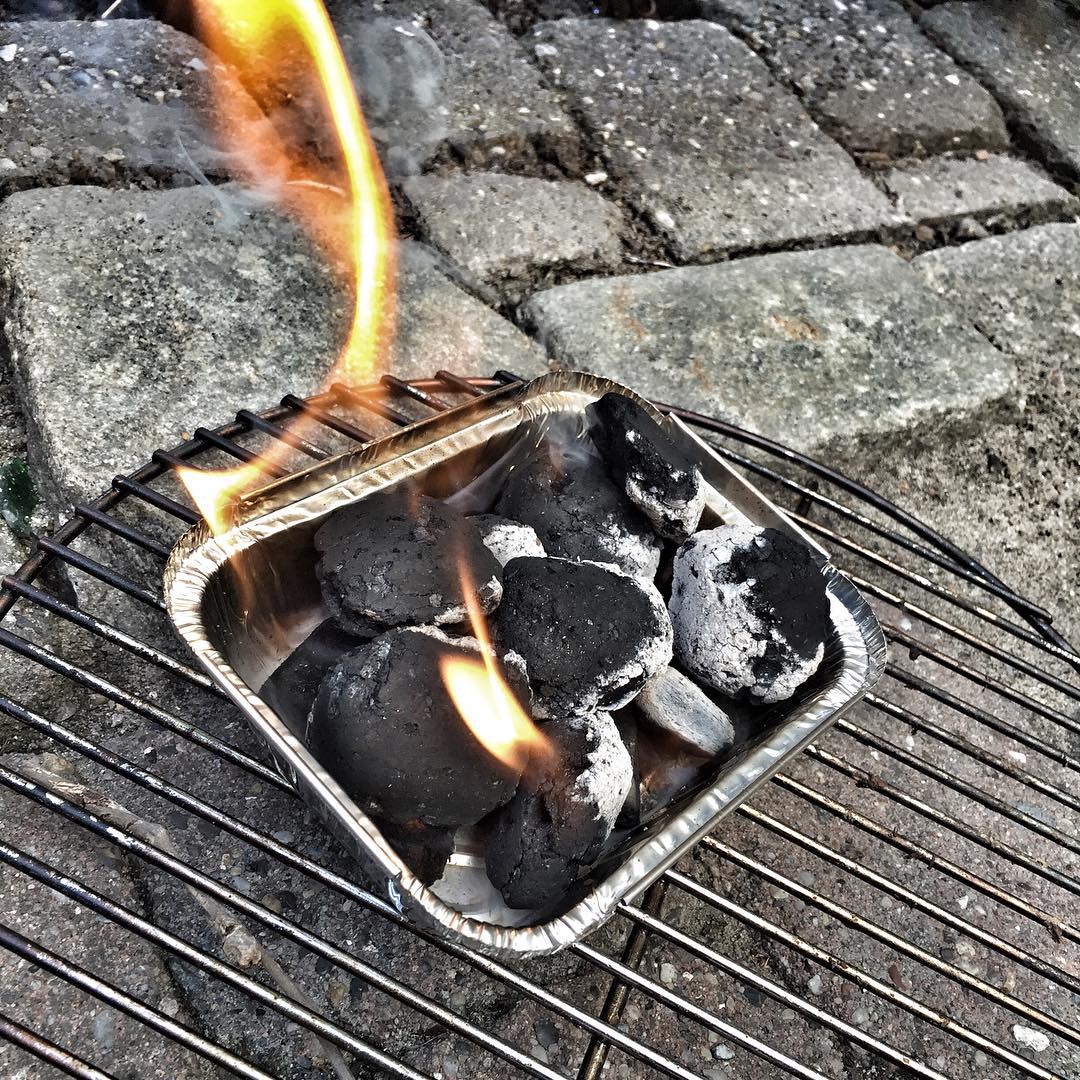
Lighting up…
Once you’re comfortable with the setup, take a step back and give yourself a pat on the back. Then go retrieve your pork shoulder. It’s time to light things up! The easiest way to do this, by far is to light a couple of briquettes on the side. Either in a small aluminum pan or in a chimney starter. It doesn’t take a lot. 5-10 really should do it, depending on the size of your kettle grill – five for a small, ten for a standard size Weber kettle grill. If you’re working with a large scale smoker setup, you’ll obviously need more.
Once your starter briquettes are nice and white hot, it’s time to get to work. Make sure the bottom and the top vents of your grill are completely open, then, using tongs or other heatproof means, carefully lay the lit coals next to (and slightly on top of) the unlit coals at the bottom of your grill. Replace the top grate and carefully place your pork shoulder roast in it’s pan away from direct heat. Then clamp on the lid tightly and drop a probe thermometer down the top vent and wait, just wait. Pretty soon you should start to see smoke slowly and gently rising from the top grate and the temperature should start to slowly go up. The magic of BBQ has begun.
Smoke on, probe in, time to wait!
Once the probe hits about 90 degrees centigrade (195 degrees Fahrenheit), carefully edge the bottom vents about half-way closed. You’ll probably want to use gloves or tongs for this unless your hands are as feelingless as mine. If the temperature keeps rising, gently nudge the bottom vents slowly more closed until you are able to maintain a steady temperature of around 100C. That’s it, this is your goal. All you’ll basically have to do now is wait and make sure the temperature stays relatively stable in this general area. If it falls drastically, open the bottom vents a little to let in more air, if it rises too quickly, close the vents further to restrict airflow. The top vent should be open at all times to allow residual heat and smoke to escape. That’s all there is to it for now, so now would be a perfect time to go brew a pot of coffee and get some breakfast ready for yourself.
What? You were expecting this to be a lot more difficult? Well, I can’t say I blame you. There are a lot of specialty smokers, BBQ kits, fans, temperature controls and what have you designed to make life easier for you. And granted, they do. But making do without them honestly isn’t the hardest thing in the world. Manually controlling the temperature of your DIY smoker using airflow may take a little getting used to, but once you’re comfortable with it, it really isn’t much work and with a constant reading of the temperature inside your smoker, things can’t go horribly wrong.
To be perfectly honest, many are the times where I’ve just set a maximum and minimum temperature alert on my trusty wireless thermometer and taken a nap or two at this point. There isn’t much to do for the first six or so hours of cooking but to watch the temperature and the smoke level. Actually, it’s best not to disturb the meat too much. The less you can go around opening the lid and looking at things, the better. So relax, kick back and enjoy being a pit master for the next six hours, then provided things go according to plan, move on to step 5 in this guide. If you’re feeling like things might go wonky, relax, take a deep breath and continue through the next paragraph.
Step 4.5 (Day Three): Help, something has gone horribly wrong!
What? Afraid things aren’t going according to plan? Alright, I’ll be honest, it’s not unusual for BBQ novices to feel a bit of panic every now and then. Heck, it’s not uncommon for the pros either. We’re working in a very manually controlled environment here and things do fluctuate. More likely than not, you will at some point during the process think that things are amiss, you may also see the temperature start to rise or fall quite a bit. So, what do you do? Well, the very first thing to do is to take it easy and remember the first cardinal rule of BBQ: DON’T PANIC!
We’re cooking this beast for a good 12-16 hours, you’re not exactly doomed if the temperature drops a little below 90 or slightly above 100 degrees. No, really. Resist the urge to pop the lid frequently and check on things. It will not only drastically lower the temperature in your DIY-smoker, it will also cause much of the desirable smoke and smoke aromas to escape.
If you notice any larger flux in temperatures, simply stay calm and stick to the temperature control plan detailed above:
- If the temperature rises, close the bottom vent as much as possible and see if it doesn’t start to drop back down again within ten or so minutes.
- If the temperature falls, open the bottom vent to create more airflow and see if it doesn’t start rising within ten or so minutes.
Only if that does not work, should you stand back and pop the lid to examine the root cause of the problem:
If the heat is to high, your briquettes or smoke wood have probably started burning too quickly. Put the meat aside, remove the top grate and carefully spread out the embers a little so they don’t transfer heat too quickly to the unburned briquettes or smoke wood. Replace grate, meat, lid and watch the temperature drop down to a more sane level.
If the heat is too low, you may either be running out of fuel for the fire or the already burning embers are having trouble lighting the nearby unburned fuel. Try gently pushing the burning embers a little closer to the unburned briquettes and add more if needed. Open the bottom vent completely (if it’s not already), replace grate, meat, lid and things should soon be heating up again.
Basically, as long as the temperature stays somewhere between 85C and 120C, you’re all good and needen’t worry too much, just aim for the golden median at 100C and keep on smoking until you reach the six hour mark!
Step 5 (Day Three): Basting and restocking
Provided you’ve done things right and played it cool, you should be able to go about six hours without checking on the meat. If not, again, don’t worry too much, take it as a lesson and work with it. A smoker, whether professional or homemade is a wonderful, strange creature and it takes some getting to know it. You’ll learn with time and practice… Ahem, anyway, after a good six hours go ahead, pop the lid off and have a look at things.
You should notice the surface of the meat starting to brown and caramelize nicely, and you should notice that a lot of liquid has seeped into the aluminum tray beneath it. This is a mix of spices, sugars, fat and juices from the meat and it’s damn tasty stuff indeed. So we’re going to put it to good use.
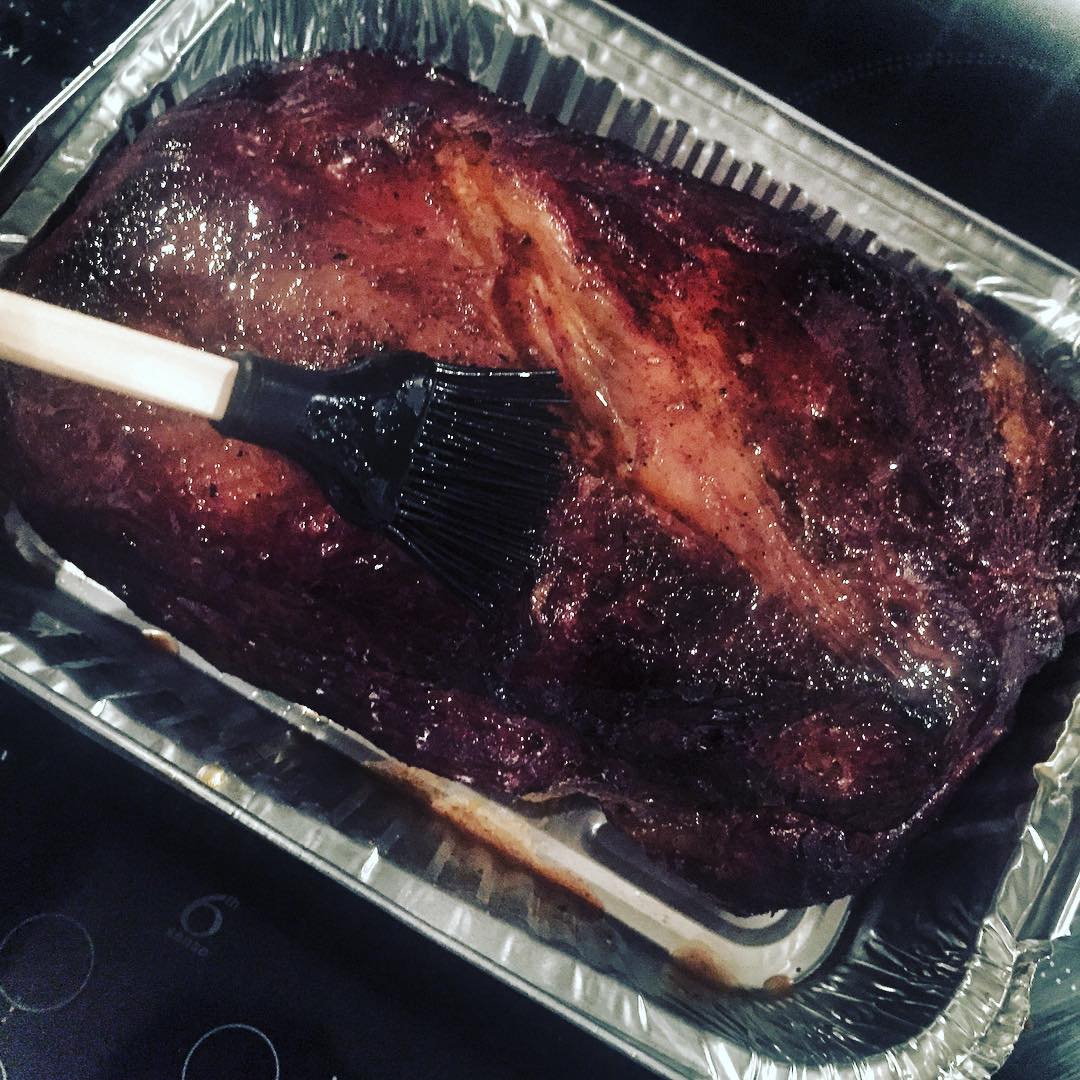
Basting time… Things are starting to look good…
Grab yourself a basting brush and generously brush the surface of the meat with the juices in the tray. This is not only going to help add a bit of extra flavor, it’s also going to help form a thicker, tastier crust (bark) on the surface of the meat. This is a two minute step that you really don’t want to miss. Not even if you don’t own a brush. If not, simply grab a spoon and spoon some of the liquid over the meat. You’ll be glad you did.
Since the lid is off, now is a pretty good time to have a look at the fuel situation. How many briquettes have gone up in smoke? Do you have enough to last for another six hours? If not, go ahead and restock, making sure not to pack them too tightly (or to far from one another for that matter). Also have a look at the smoke wood situation. If it has all gone up in smoke, I wouldn’t add more. If not, I’d gently move it a little closer to the heat to get some more smoke action going. Smoke is a wonderful flavoring agent as long as you don’t overdo it at which point the meat will take on a bitter, sooty flavor. For a large piece of pork, a total of about 120 grams of smoke wood seems to do the trick perfectly. The briquettes themselves will add a very subtle note to sort of round things off.
Once you’re happy with the fuel and smoke situation, put everything back in place, reapply the lid, let the temp get back up to 100 degrees and find something to do for another six hours, making sure to monitor the grill and the temperature ever so often. Again, BBQ isn’t difficult, it just takes time… Lots of time!
Want to cheat? Finish it in the oven! Once again, I wouldn’t encourage you to cheat, but since we’re basically done applying smoke at this point you could, if you wanted to save some effort, finish the pulled pork in a low oven at 100C. But that would, of course, be cheating.
Step 6 (Day Three): Decision Making Time!
Wow, are you still here? That’s amazing! Ahem, well, after an amazing 12 hours of cooking, it’s time for you as the pit master to make a decision: evacuate or stay till the bitter end. 12 hours in, your pork butt will be done (technically, it was overdone hours ago, but that’s another story) and it would be very fine indeed to serve as is.
Checking for doneness: To check if your pulled pork is done, simply plunge your temperature probe into the middle of the meat. It should register anywhere from 85 to 89 degrees.
However, I have been playing around with various ideas and procedures, so here’s what I propose if you have the time and patience: Rather than evacuating now, give the butt one last basting with its own juices and leave to cook at 99 degrees for another 3-4 hours. It’s an entirely optional step and one that I wouldn’t actually frown at you for skipping. The choice is yours, so make one and stick with it. Proceed directly to step seven or wait it out for another 3-4 hours.

I think we’re about done here!
Why wait? Well, my experience tells me that the extra couple of hours will render the finished product even more tender and juicy and the bark even more flavorful, while going on much longer than 16 hours will actually start to dry the meat out and leave the bark tasting almost too intensely.
Step 7 (Day Three): The pulling of the pork
Well, this is it, friends. Whether it has been twelve, fourteen or even sixteen hours, we’ve reached the end of the journey. Give yourself a pat on the back, you’ve done very, very well, now is your time to shine! Well, almost!
Before you can do any wowing, first open the lid of your grill/smoker and carefully remove the aluminum tray, meat juices and all and set aside to rest for 15 to 30 minutes while you gather up your guests for the only gratifying showpiece bit of cooking in this entire procedure: The pulling of the pork!
Once you’re sure everybody (or at least somebody) are watching, very ceremoniously grab two forks and plunge them into the center of the meat, now slowly but steadily start pulling to either side, the meat should simply come apart with no effort at all. Continue shredding the meat, mixing in the juices as you go, until you’ve torn everything into a juicy, succulent mess of stringy, meaty goodness. You can use your hands, too, if you so desire, or invite your guests to join in on the fun. Don’t underestimate the sense of achievement they’ll achieve from pulling their own pork.
And that’s it, now all we have to do is add some extra… Bam! Once your pork is a uniform mess, sprinkle in a good few tablespoons of excess dry rub for extra flavor, then hit the pile of meat with a very generous sprinkling of quality apple cider vinegar to give it some edge. Then simply mix thoroughly and prepare to pig out!
White men can’t jump, but they can produce pretty decent BBQ!
This last step may seem a bit harsh, but believe me, with all the fat, gelatine, sugar and spice in there, the fruity, acidic punch of a good apple cider vinegar will be just what’s needed to blast through the richness and elevate the flavors even further.
Congratulations, it may have taken you a few days, but those couple of days have been spent well making what may well be the best damn pulled pork you’ve ever had in your life. Unless, of course, you’ve been to The Commissary in Germantown, TN, in which case I’m sorry, but hey, at least what you just made is a reasonable approximation that will still wow people! So gather up your friends, your pulled pork and sides, and get ready for a party…
Step 8 (Evening, Day Three): Serve it up and have a party
How would a would-be BBQ aficionado such as myself serve his pulled pork, then? Well, you’ll be happy to know that there really are no rules. Over the course of the next few instalments in the Beginner’s Guide to BBQ series, I’ll offer up some recipes and ideas for sauces, sides and more, but your preference really is as good as mine.
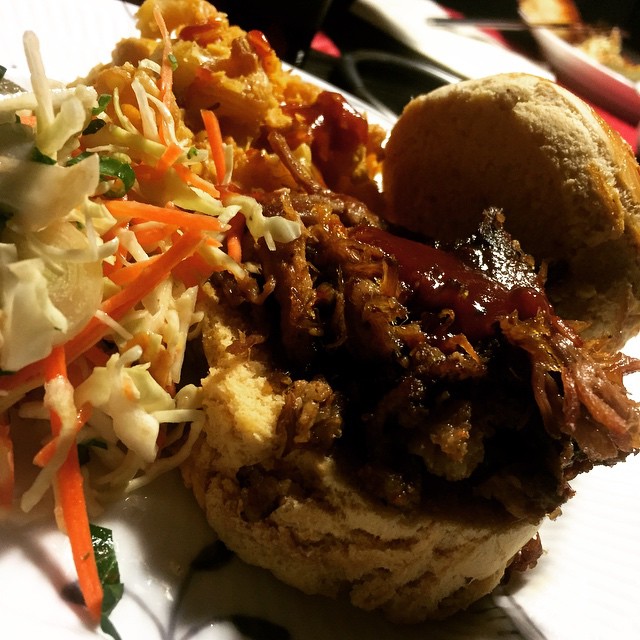
The only general rule to serving pulled pork is that it should be a party for everybody involved. You can serve it up on its own or in a bun as a pulled pork sandwich. You can go old-school on the sucker and serve it up sauceless with only the vinegar to add zing, or you can douse it in your BBQ sauce of choice. Some people like coleslaw, others don’t. Why not let them chose and build their own sandwich?
It doesn’t have to be pretty, it only needs to be a party!
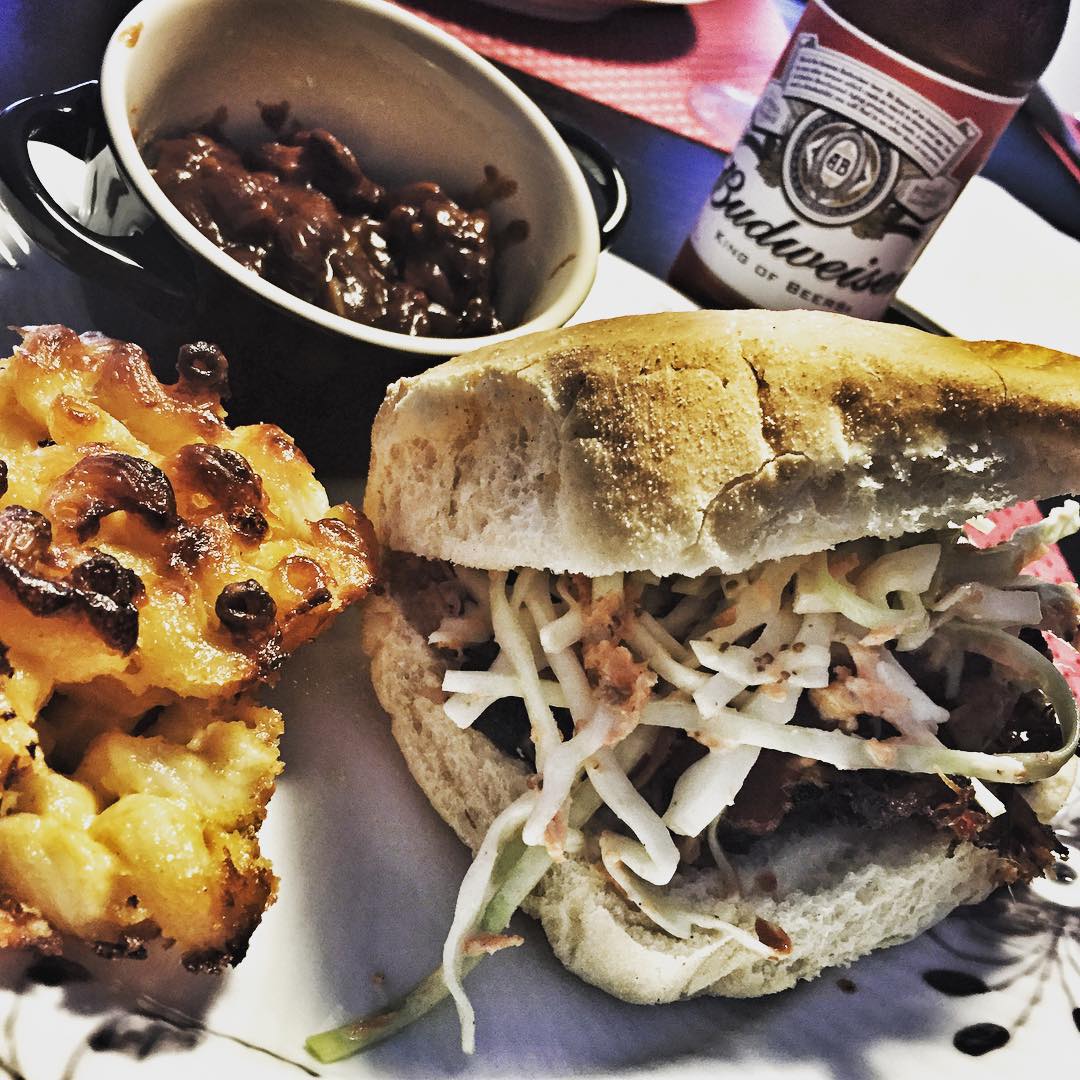
I personally dig my pulled pork on a quality bun (my food blogging buddy Kim has a pretty nice recipe for you Danish speaking people out there), served with a side of tangy slaw, a Carolina style BBQ sauce and a side of Mac ‘n’ Cheese or BBQ beans, a decent homemade pickle (possibly fried) and, of course, an honest to God American beer or two… Or five! Most importantly, though, I like my pulled pork in the company of great friends, lots of laughs and some good old-fashioned rock n roll music.
Oh, alright, I’ll be a little more specific than that. But that’s another post, this one has run on for long enough. Watch this space for much more in terms of BBQ condiments and sides, starting with what I believe to be *the* killer BBQ sauce!
Till the next instalment in our series: Smoke on! Oh wait, the recipe…
Pulled Pork BBQ: The Perfect Recipe
Note: For perfect results, do not forget to make a batch of my perfect dry rub! You’ll find the recipe here!

Perfect Pulled Pork
Ingredients
Pork:
- 3 kg quality pork shoulder bone in if you can get it
Brine:
- 1 liter unfiltered apple cider
- 500 grams ice cubes
- 60 ml Worcestershire sauce
- 55 grams dark brown sugar
- 55 grams salt
- 4 bay leaves
- 4 garlic cloves lightly mashed
- 1 tablespoon Red pepper flakes
- 2 long peppers can substitute 8-10 black pepper corns
Dry rub:
- 100 grams dry rub mixture
Finishing touches:
- 2 tablespoons dry rub
- 50 ml quality apple cider vinegar
Instructions
Making the brine:
-
In a large pot, mix all brine ingredients except ice and heat it up over medium heat, stirring till the sugar and salt has dissolved.
-
Remove pot from heat, add ice, stir and leave to cool to room temperature, then refrigerate till cold.
-
Once brine has cooled completely either carefully submerge the pork shoulder in the brining solution or place it in a suitable container and pour over brine until pork shoulder is fully covered.
-
Leave pork shoulder to brine for 24 hours.
Applying the dry rub:
-
Evacuate the pork shoulder from the brine and discard the brine.
-
Wash pork shoulder thoroughly to wash off excess salt on the surface, then pat dry and place on a cutting board.
-
Sprinkle pork shoulder genereously and evenly with dry rub mixture and pat/massage it into the meat - they call it a rub for a reason - then flip the shoulder over and repeat, aim for even coverage on all sides.
-
Wrap the pork shoulder tightly in cling film or a ziplock bag, place in an aluminum tray or similar (to avoid spillage) and stash in the fridge overnight (or twelve hours).
Smoking:
-
On the day of cooking, firstly remove the pork shoulder from the fridge, unwrap and leave to sit at room temperature while you get the grill or smoker ready.
-
Fire up your grill or smoker in any which way you prefer or check out the instructions above.
-
Once things are smoking, place the pork shoulder in an aluminum tray away from direct heat heat and close things up.
-
Leave shoulder to smoke at around 100 degrees centigrade for a good six hours.
-
At the six hour mark, open the lid of your smoker and generously baste the shoulder with the accumulated juices in the tray.
-
Restock the fire if needed and replace the lid, leave to cook at 100C for another six hours.
-
At the twelve hour mark, remove the lid, baste the shoulder again and replace the lid.
-
Your pork shoulder should technically be done at this point (a thermometer probe should display 85-89 degrees of internal temperature) - but for perfect results, you could (and some would say should) continue cooking at 100C for upwards of another four hours.
Pulling the pork:
-
Once you’re happy with the results, be that after 12 or 16 hours, lift the pork shoulder, tray and all, off the smoker and carry it to the kitchen table or any suitable flat, sturdy surface. Leave to rest for about 30 minutes so that the juices may distribute evenly throughout the meat.
-
Grab a couple of forks and start thoroughly pulling and shredding the meat apart, drizzle with another tablespoon or so of dry rub and sprinkle on a generous amount of quality apple cider vinegar, then toss thoroughly to coat evenly.
-
Serve on buns if you so desire, with or without sauce, coleslaw and whichever sides you desire.